Pages


7/26/16

Straw Beach Bag For An 18" Doll

One of my girlfriends had been given boxes and boxes of fabulous craft supplies given to her by the son of a women who recently passed away. My friend was super generous and let me come over to help myself to the massive amounts of crafting loot. I came home with boxes and boxes! One of the many things I came home with was some small straw hats.
I've have had some of these before and I never really found a use for them-- but that didn't stop me from hauling these ones home. *wink* I plunked one of the straw hats on the head of an 18" doll.... Way. To. Small....

What to do with them, what to do with them... My first thought was to pull them apart and then glue them back together making the straw hats bigger so that they would fit the head of an 18 inch doll or a Disney Animator doll. I snipped a piece of the thread holding the long woven strips together then gave the strip a pull and up popped the threads. I thought I could do this all around the hat... I pulled again, the woven straw strip broke off the hat. Nuts. I began to fold the hat in half to stuff it in my little trash can when I had an "a-ha moment" That is when I realized it looked like a little straw beach bag! Duh. I filled up a plastic shoe box with some hot water and submerged all of the straw hats in the water for about fifteen minutes. I gently stretched and pulled each hat to create what hopefully looks like a straw beach bag. I then laid the newly created straw beach bags in the hot sun and they dried thoroughly in about 30 minutes.
I pulled some random colors of fabric to line each bag and got to work. For the straps I cut two long strips that measured 2" x 9" I simply folded the strip in half and then folded the edges into the center to create each strap, then it was just a matter of stitching up both sides of each strap to finish them off. Next, I made a paper pattern for the fabric liner of the straw bags. I stitched up around the bottom seam leaving the top open for the opening of the straw bag.
I used hot glue to attach the straps to the inside of each the straw bag... easy peasy.
 I ran a small amount of glue along the bottom of the straw bag to help hold the bags liner in place while I fiddled with the next step of attaching the fabric around the top curve. I cut little snips into the fabric to help ease it around the curved shape of the top of the straw bag.

To help hold the liner against the bag I load the bag with a heavy sack of pirate treasure.... then I just folded and tucked the cut pieces trying my best to line up the fabric along the edge.
I used clothespins to help hold it in place until I was ready to hot glue it permanently in place.
Once the straps and the liners were attached to the straw bags, I embellished each one with a ribbon flower.
I am pretty happy with how they turned out...

My favorite one was made using darker fabric, I'm going to keep this one for my grandaughter's Disney Animator doll.
Here you can see my 18" pattern doll modeling one of the straw purses.
 Here is Anna with a straw bag too. She likes little stuffed animals, so this bag will be perfect for her to carry around her toys. 
Big thanks to my pal Diannia for the craft loot. Your so very generous :-)
big hugs,
Cheryl

7/13/16

Backyard happenings....

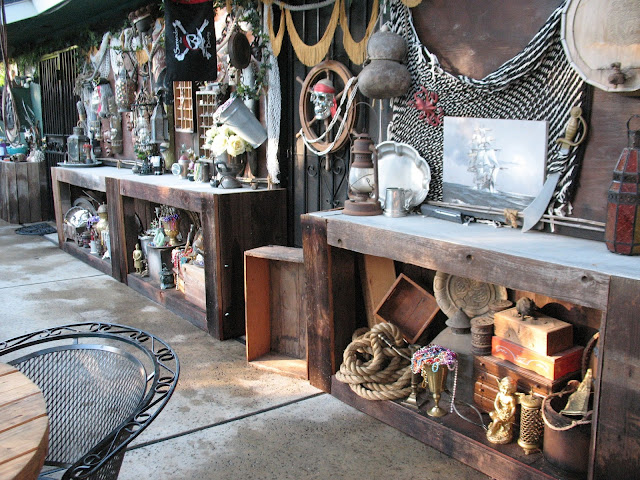
We extended our outdoor buffet table in our pirate backyard--- although this was finished about a month ago-- I'm just now getting around to sharing it. I have so many projects going on at once...it just seems like I finish up one project and then just transition into finishing up something else like it is just one ginormous project. When I finally do sit down to blog about "something" I'm at a loss as what to share because everything just seems like it is all one big project and all a work in progress!  Any-who... here it is... Taaaaaa~daaaaaaaaaa! We have added another 30' of buffet/counter space to the already existing 25' we had previously made.
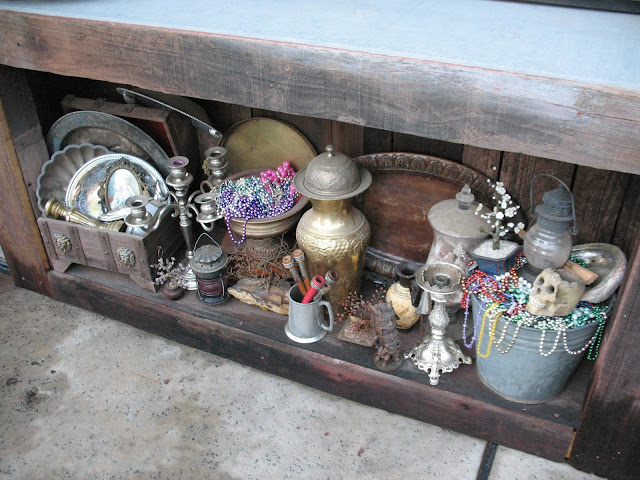
 The bottom of each section is open to showcase pirate treasure~
When creating these sections we added plywood sheets to the top/back of each section so I could have another place to decorate with odds and ends of pirate treasure.
 Today I added some rope to the boxed posts to use as a gentle reminder not to fall into the pool. We have only had ONE person fall into the pool--- it still makes me laugh when I remember that!
So, now the entire length of the back of our house is a usable space with a l-o-n-g counter along it. The space is perfect for when we have large B.B.Q. parties in our backyard. We have even added several power strips along the buffet table to plug in crock pots or anything needing electricity.
 I have a lot of fun jewelry tucked inside these little shadow boxes. My friend stained and sealed these for me... sweet huh.
 Sometimes I randomly pluck a blingy-ring from these boxes and wear it while I goof around in my pirate yard....
 The bottoms are looking a little bare, but before you know it, they will be bursting at the seams with treasure.
 Occasionally, my dog will be running around with a gold doubloon in her mouth, but for the most part she is an angel considering all there is in the backyard that I'm sure tempts her daily. At six months old, she now weighs in at 45 pounds...
I finally found a fun place to hang one of the many pirate flags I have...
 It is wonderful having a pirate themed backyard, it is great when I'm tired of something inside my house to be able to put it in my backyard and still enjoy it. (Silver champagne bucket with the Ivory colored Roses)
 Here is a shot of the entire length of the back of our house showing 55' of buffet-table-space. We generally use the 25' of buffet table way at the other end of this photo. This new area will be perfect for an upcoming Halloween party or two..or three.... where everyone brings a bag of candy and we have a "candy exchange" party.
 At the very end of this buffet table I had to stop short because of the cement sloping down and of course the gate opens inwards-- so I added some netting and sea shells to this area to cover up the wall.
While treasure hunting this past weekend I found a few fun pirate treasures to stash in my backyard.... A few more pirate hooks and some silver items to play around with.

I was looking for another round table for my backyard... I have five already, why on earth do I need another one?.... The asking price on this table created using one of the rounds off of a wooden cable spool was $50... I got it for $25.00. I think it is pretty darn cute! I am planning on staining it with a nice oak stain to help seal the wood and give it a nice aged appearance.
I am getting ready to host a few more parties this month, I've just got a few tiny projects to get completed before hand. I only wish my shoulder wasn't acting up... blah. I've got Adhesive Capsulitis... a.k.a. Frozen Shoulder. Hurts like a sun-of-a-gun...
Oh well... could be worse right? Could be better... but it could be worse.
big hugs,
Cheryl