At first I was concerned that I wouldn't have any elastic at home knowing all the elastic in town is sold out. I don't know why I was worried, if you know anything about me, you know I like to buy things in bulk. I've got a full spool of elastic and a full spool of twill tie as well. Plus a jar full of white and black thread... and obviously a huge hoard of fabric. *wink*
So, here is how I make my easy peasy face mask.
Firstly, you'll be needing a piece of fabric measuring 9" by 12" I've got a huge stack of fabric cut, I like to buy in bulk-- and I like to make things in bulk too!
Take the rectangle fabric and fold it over so it now measures 9" by 6" Pin the sides together along the 9" side so that there will be an opening to turn the mask inside out when the piece is completely sewn together. I used a 1/4 inch seam allowance.
Next you'll be working along both sides of the mask (the 6" sides) Cut a piece of elastic 7" long. Place the elastic inside the mask and pin each edge to each corner on one side of the mask.

It will look kinda wonky, but it will lay flat---
when you pin it down. Do this on the other side of the mask as well.

Sew along both sides of the mask using a 1/8 inch seam allowance. Go back and forth over the elastic to make sure it is securely attached. You can use a 1/4 inch seam allowance, but it makes the mask a smidgen smaller, its your call. So here is the mask sewn together. At this point, using the opening in the 9" side turn the mask inside out.
Once it is turned inside out you can see it resembling a face mask.
Iron the mask flat.
Now comes the part in constructing the mask where you'll be creating the pleats. Don't be intimidated, it is easy peasy. If I can explain it well that is! First, figure out which side is going to be the front as opposed to the back, and also, the top from the bottom. If your working with a pattern in the fabric, it should lay with the image/words facing you. Once you've figured all that out, fold the mask in half and iron it creating a nice crisp edge.
Next, open up the mask and take the bottom of the mask and iron the bottom edge up to the line created when you folded it in half previously. Iron that crease in the fabric.
Here is what the backside of the mask looks like. I've highlighted the ironed creases with chalk so hopefully you can see what I was trying to explain. 1.)Fold in half 2.) fold the bottom edge up to the middle 3.) fold the top edge down 1/4 inch above the center line.
Lastly, pulling the fabric together to create the pleats. I'm hopeful I'll explain it well enough for you to understand me-- if you choose to give this mask a try.
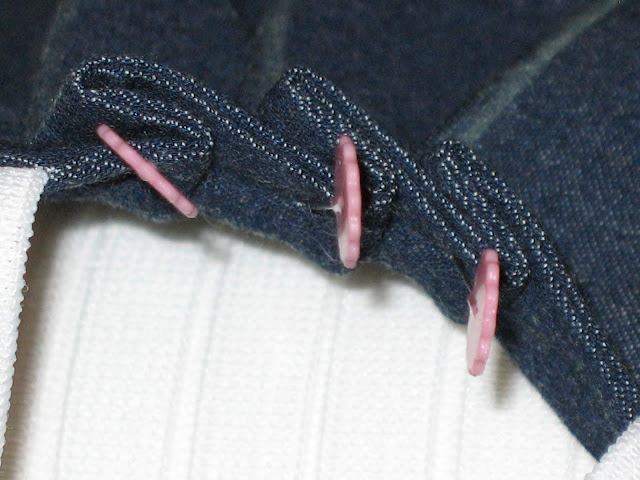
Ok... so, the previous photo shows the backside of the mask....so I needed to turn it over to start making the pleats. Each crease you created when folding and ironing the fabric will be the backside of each pleat. First pleat: open up your mask you have what looks like four rows. I like to start with the wider side, the one that folded up to meet the center line. I fold one side completely before going to the other side of the mask.

Hopefully, looking at this next photo will be helpful! This photo is the backside of the mask. See how the chalk lines line up with the fold of each pleat? That is what you want. The ironed crease is pinched, then the fabric is folded onto itself and pinned...

If you take some fabric and just try to copy the above photo-- you'll get it, I promise! So, here is one side pinned and now I've started on the other side of the mask.
Again, here is the pleats from the backside--- the ironed creases will be folded to the back. So, you pinch the fabric and lay it down and pin it.

Now, if you've got all that. the last thing you'll be needing to do is sew along the entire outer edge of the mask. I used a 1/8 inch seam allowance. You can use a 1/4 inch seam allowance it wouldn't change the size of the mask at this point, but make sure your catching and closing the opening you've used to turn the mask right side out.

Here is the mask completed.
I like to iron the completed mask super flat... and then iron them in half. This serves two purposes. One, it looks cuter... and two, if by chance someone (even though they shouldn't) rewears the mask, the person will be able to tell which side should be up against their face. These masks should only be worn one time then washed and dried to be worn at another time.
Here is the finished mask popped open.
The mask is surprisingly comfortable to wear. It does have a gap at the bridge of your nose -- but you can easily tighten that up by adding some double sided tape and adhere it to your face.
One word of advice, don't use super cute/adorable fabric! People stop and talk to you about your mask! Move along people, move along...
Stay safe! Big hugs,
Cheryl


