

.jpg) Sooooooooooooo I fixed it.... here is the after photo of the same Easter tree.
Sooooooooooooo I fixed it.... here is the after photo of the same Easter tree..jpg) Here is how I did it if anyone is interested :-)
Here is how I did it if anyone is interested :-)I took a good look at the tree and decided it needed more branches for starters...and a better/simpler way of attaching the ornaments. I cut off the excess wire on each existing branch and then I used my pilers to bend the remaining wire into little circles. This really streamlined the tree into a better shape. .jpg) I then started adding more branches to the tree. I used the heaviest wire I had in my "wire stash" and simply attached some of the previously cut off wire from the tree that I formed into straight bits with loops at the end. I used regular masking tape that I cut into lengths of about 3 to 4 inches and then I cut those in half length wise.
I then started adding more branches to the tree. I used the heaviest wire I had in my "wire stash" and simply attached some of the previously cut off wire from the tree that I formed into straight bits with loops at the end. I used regular masking tape that I cut into lengths of about 3 to 4 inches and then I cut those in half length wise. .jpg) This worked out really well! I then used the thin pieces of tape to attach the brances to the tree trunk.... then I used a wide piece of tape over that to secure it completely. Easy-peasy~
This worked out really well! I then used the thin pieces of tape to attach the brances to the tree trunk.... then I used a wide piece of tape over that to secure it completely. Easy-peasy~.jpg) Now that the tree was a little fuller and the loops were all in place. I decided that the whole thing needed to be painted. What color to paint it was the hardest part of this whole make-over..... paint it a pastel color?? paint it brown like a tree?? I figured brown would hold up better to little grubby hands-- and would be easier to touch up if need be in the future.
Now that the tree was a little fuller and the loops were all in place. I decided that the whole thing needed to be painted. What color to paint it was the hardest part of this whole make-over..... paint it a pastel color?? paint it brown like a tree?? I figured brown would hold up better to little grubby hands-- and would be easier to touch up if need be in the future..jpg) After the tree had been painted I made a box out of foam core that fit snuggly into this cute little metal container. I didn't want to commit to having this tree in this container permanently, so this was the next best thing.
After the tree had been painted I made a box out of foam core that fit snuggly into this cute little metal container. I didn't want to commit to having this tree in this container permanently, so this was the next best thing..jpg) I went over each inside seam of the foam core box with some additional hot glue to seal the box really well because the next step was to add some plaster of paris to secure the Easter tree base inside the foam core box. I added some scraps of foam core to raise up the tree's base.
I went over each inside seam of the foam core box with some additional hot glue to seal the box really well because the next step was to add some plaster of paris to secure the Easter tree base inside the foam core box. I added some scraps of foam core to raise up the tree's base..jpg) Then I mixed some plaster of paris and poured it around the base that was pearched inside the foam core box.
Then I mixed some plaster of paris and poured it around the base that was pearched inside the foam core box. .jpg) While the tree base was setting up I turned my attention to the ornaments. I pulled out the strings in each ornament and went to work drilling a hole into each one...
While the tree base was setting up I turned my attention to the ornaments. I pulled out the strings in each ornament and went to work drilling a hole into each one....jpg) The drilling was pretty easy...I wore a glove on my hand holding the tiny ornaments just in case I slipped with the drill.
The drilling was pretty easy...I wore a glove on my hand holding the tiny ornaments just in case I slipped with the drill..jpg) Then I pulled out of my "wire stash" some Christmas ornament hooks. (I always pick those up at the after Christmas sales, they are perfect when your needing just a "little bit" of wire) Anywho, I cut each wire into two pieces, curled up one end to make a "hook" and glued the straight bit (obviously) into each tiny hole (that I had previously drilled) using E6000 glue.
Then I pulled out of my "wire stash" some Christmas ornament hooks. (I always pick those up at the after Christmas sales, they are perfect when your needing just a "little bit" of wire) Anywho, I cut each wire into two pieces, curled up one end to make a "hook" and glued the straight bit (obviously) into each tiny hole (that I had previously drilled) using E6000 glue. .jpg) Next, I cut some leaves out of felt...I just randomly cut shapes while watching/listening to the t.v.......and then just used hot glue to attach them to the tree and also to the ornaments. I then turned my attention back to the tree. To the top of the tree to be exact. I pulled down the two wires I left on top of the tree and bent them down and up and attached...
Next, I cut some leaves out of felt...I just randomly cut shapes while watching/listening to the t.v.......and then just used hot glue to attach them to the tree and also to the ornaments. I then turned my attention back to the tree. To the top of the tree to be exact. I pulled down the two wires I left on top of the tree and bent them down and up and attached...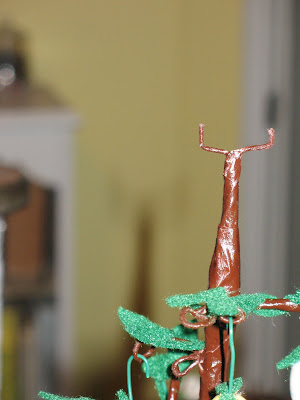 a small birds nest to the tippy-top. I then glued some green leaves around the base of the birds nest just to pull it all together~ I didn't glue the bird into the nest. Who knows, my 2 year old grandson might like a car in that nest! lol
.jpg) To cover up the plaster in the base, I cut a piece of yellow felt to cover the stark white plaster. I then filled in the top of the container with some yellow paper shredding. I used paper because I have 3 indoor cats that are eventually going to nibble this I'm sure!
To cover up the plaster in the base, I cut a piece of yellow felt to cover the stark white plaster. I then filled in the top of the container with some yellow paper shredding. I used paper because I have 3 indoor cats that are eventually going to nibble this I'm sure! Here is the newly revamped Easter tree waiting to be played with.
 .jpg) Taaaaaaaaa daaaaaaaaaa instant caute!!
Taaaaaaaaa daaaaaaaaaa instant caute!!
I then started adding more branches to the tree. I used the heaviest wire I had in my "wire stash" and simply attached some of the previously cut off wire from the tree that I formed into straight bits with loops at the end. I used regular masking tape that I cut into lengths of about 3 to 4 inches and then I cut those in half length wise. This worked out really well! I then used the thin pieces of tape to attach the brances to the tree trunk.... then I used a wide piece of tape over that to secure it completely. Easy-peasy~Now that the tree was a little fuller and the loops were all in place. I decided that the whole thing needed to be painted. What color to paint it was the hardest part of this whole make-over..... paint it a pastel color?? paint it brown like a tree?? I figured brown would hold up better to little grubby hands-- and would be easier to touch up if need be in the future. After the tree had been painted I made a box out of foam core that fit snuggly into this cute little metal container. I didn't want to commit to having this tree in this container permanently, so this was the next best thing.I went over each inside seam of the foam core box with some additional hot glue to seal the box really well because the next step was to add some plaster of paris to secure the Easter tree base inside the foam core box. I added some scraps of foam core to raise up the tree's base.Then I mixed some plaster of paris and poured it around the base that was pearched inside the foam core box. While the tree base was setting up I turned my attention to the ornaments. I pulled out the strings in each ornament and went to work drilling a hole into each one...The drilling was pretty easy...I wore a glove on my hand holding the tiny ornaments just in case I slipped with the drill.Then I pulled out of my "wire stash" some Christmas ornament hooks. (I always pick those up at the after Christmas sales, they are perfect when your needing just a "little bit" of wire) Anywho, I cut each wire into two pieces, curled up one end to make a "hook" and glued the straight bit (obviously) into each tiny hole (that I had previously drilled) using E6000 glue. Next, I cut some leaves out of felt...I just randomly cut shapes while watching/listening to the t.v.......and then just used hot glue to attach them to the tree and also to the ornaments. I then turned my attention back to the tree. To the top of the tree to be exact. I pulled down the two wires I left on top of the tree and bent them down and up and attached...a small birds nest to the tippy-top. I then glued some green leaves around the base of the birds nest just to pull it all together~ I didn't glue the bird into the nest. Who knows, my 2 year old grandson might like a car in that nest! lolTo cover up the plaster in the base, I cut a piece of yellow felt to cover the stark white plaster. I then filled in the top of the container with some yellow paper shredding. I used paper because I have 3 indoor cats that are eventually going to nibble this I'm sure!Here is the newly revamped Easter tree waiting to be played with. Taaaaaaaaa daaaaaaaaaa instant caute!!
That tree turned out so cute! Good choice on the brown for the tree itself, makes it look more like a real tree. And I love the pot you put it in. Goes great with the 'springiness' of the tree. I'm sure your grandson will love playing with it. And how is he liking his new sister? They are both so adorable.
ReplyDeleteHave a great weekend.
Brenda
You never cease to amaze me! great job! happy first day of spring!
ReplyDeletehugs
vivian
This comment has been removed by a blog administrator.
ReplyDelete