Pages


12/21/16

Doll Clothing

I've been busy creating some new outfits for my grandaughter's Disney Animator dolls. Here is Ariel sporting a Disneyland outfit with matching shoes.
 Little Anna is wearing a candy cane flannel dress with little bloomers and matching shoes....
 Pocahontas is wearing a little flowered dress with a matching headband and shoes.
 I wanted to create a snowflake inspired dress for Elsa. I used white fabric that has glittered beads on it- for an ice crystal look to the dress. I also created a ribbon flower headband and a detachable cape and matching shoes.

 The cape can be pulled forward for a completely different look.
 The cape is just tucked inside the back of the dress.  I didn't want it to be attached so the cape can be added to any dress that my grandaughter would like to add it too.

Here is Merida... She prefers to be naked.... but she was kind enough to put on this plaid dress with black velvet shoes. The back of this dress has a stunning bow on it-- but Merida refused to turn around for a photo of it.
 
Here is little Anna again, she is wearing an outfit I created for Aladdin. I don't have any boy dolls so in a pinch Anna said she would showcase it for me. I made him a t-shirt, black pants and some brown shoes.
 Here is sister's Anna and Elsa wearing two more of the dresses I made. That purple fabric was a bear to work with... but in the end made a darling dress, shoes and headband. I added a small gingerbread man to the Christmas print that Anna is wearing.
 Lastly, is Rapunzel. She is wearing a red velvet dress and matching shoes. The red velvet dress looks long in this photo-- but it isn't that long in person. I also made all of her dolls Santa hats to wear.
I had to buy myself a new sewing machine at the tail end of creating all of these doll outfits. The thread tension on the Brother sewing machine I had bought at a yard sale years ago for only $25 bucks kept giving me fits... I bought a "Project Runway" Computerized Brother sewing machine that I am In.Love.With. Oh my goodness... what a difference a new machine makes in your life! This little beauty has a self threader! I have plans to make some more doll clothing in the near future. I personally have seven of the Animator dolls... and only one of them likes to be naked. The rest would like some clothing!
big hugs,
Cheryl

12/17/16

Paper clay Mermaids

The Paper clay mermaids I made took So. Long. To. Make. POO! I created the little base of each Mermaid using some tin foil, a small piece of a pipe cleaner, a little bit of cardboard and some tape. I pre-made tiny paper clay faces that I used to determine how big the mermaids would be. Each mermaid measures about 3 1/2 inches.
 I then covered the bodies with paper clay. I forgot how much I love working with this clay. The drying time between the layers of the paper clay made this quick project take forever to complete. I have read that you can place wet paper clay into a dehydrator and it will speed up the drying time considerably-- so I may be on the look out for one of those in the near future.

After sanding the little mermaids I set out to paint them....

For the mermaid hair I tied little bundles of tinsel together and simply glued the hair in place on top of each head.

I think they turned out kinda cute~ The little faces look very garish in these photos, but hanging on the tree they look fine.

I also glittered up some seashells to add to the tree as well.
I had no rhyme or reason for the way I posed each mermaid.... When each one was finished I had to figure out what to do with the arms/hands--- so I added some small shells or some glittered seaweed and some small pearls.

Of course, I added some rhinestone necklaces too.

I was going to create a spectacular tree topper but figured I had better keep plugging away on the doll clothing I am creating for a Christmas gift....

So I just added a mermaid at the top of the tree for now.

I'm glad they are finished!  Although-- at a later date, I may cut each mermaids hair a little shorter as you can't really see the mermaids tails very well.

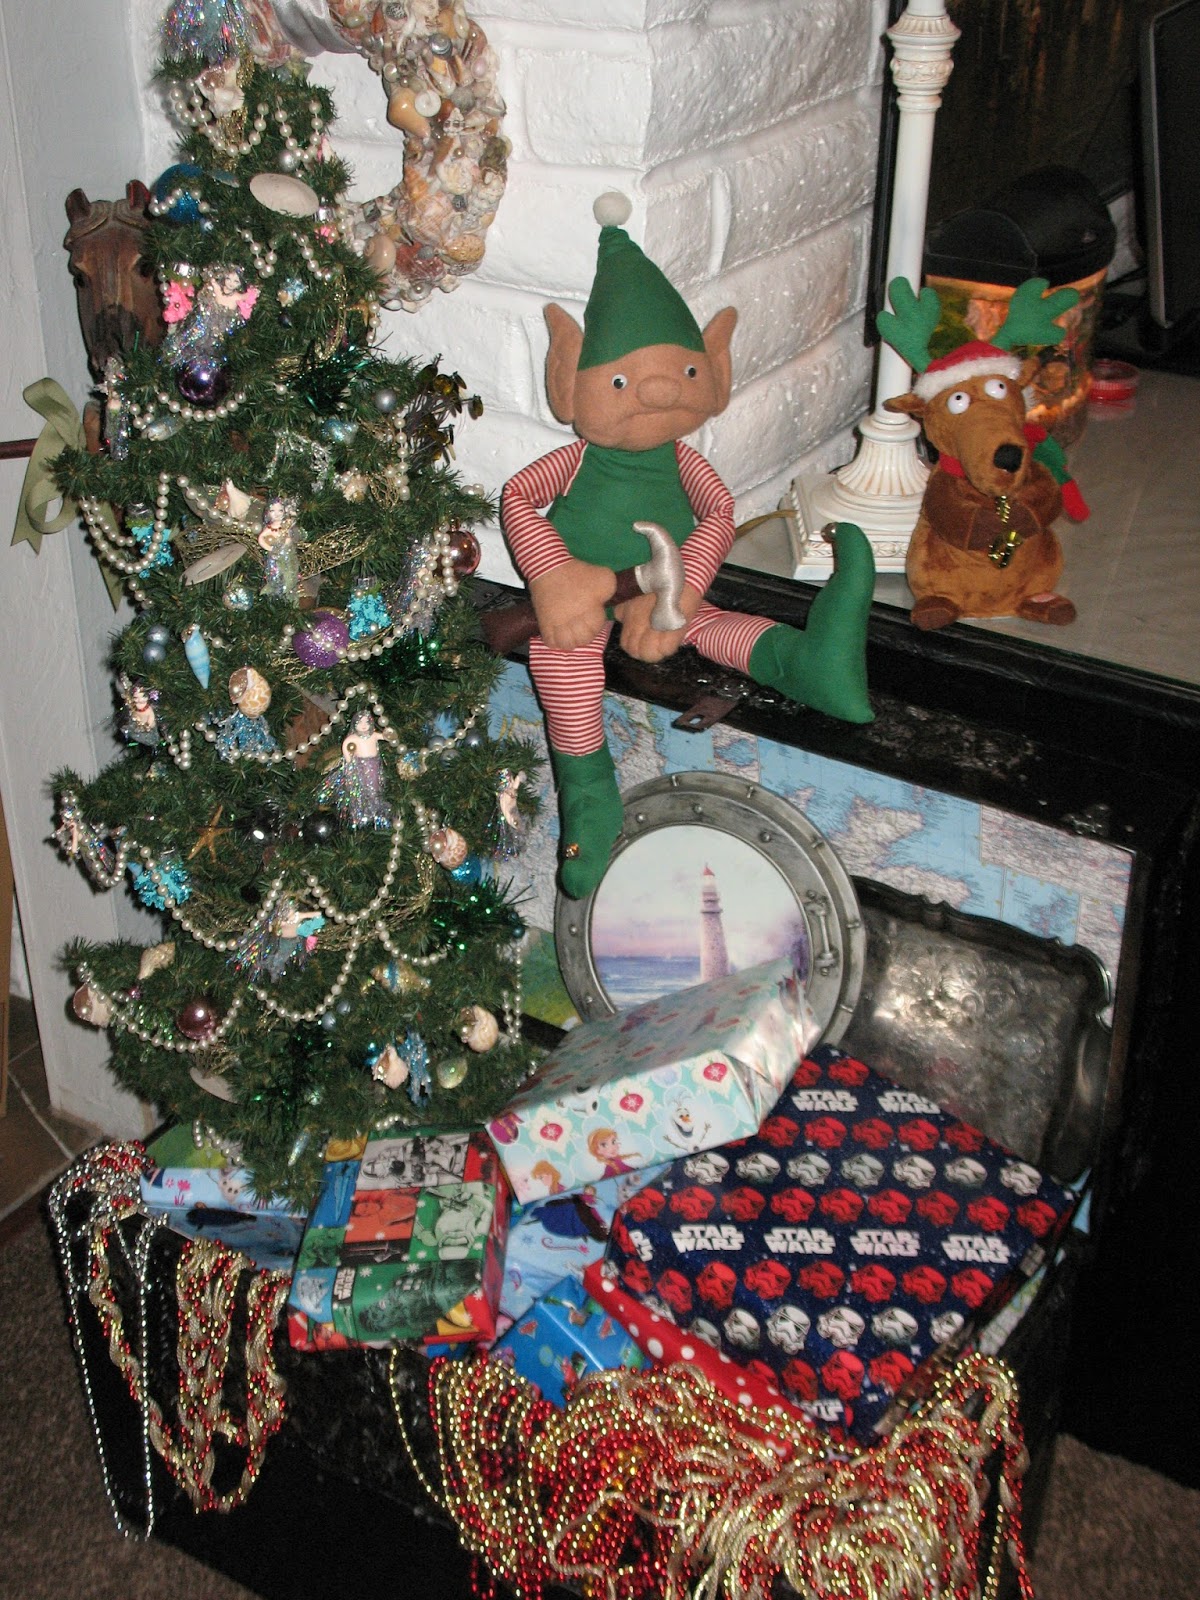
Remember the old green trunk I bought a few weeks ago? I painted it black and highlighted the embossing on the old trunk with some metallic silver paint.
I lined the entire trunk with old maps. I'm in love with it! I have never had a tree with a tall tree trunk before, when it was fully decorated I thought it looked a little "wonky"-- so I stuck it in the old steamer trunk and added a few presents in the trunk as well. A mermaid tree in a pirate chest. Perfect. I see our 30 year old magic elf has found his way to the pirate chest.....

It is hard to believe Christmas is a week away!
I still have presents to wrap! Oh well.... I'll muddle through it!
big hugs,
Cheryl

12/14/16

Mermaid Christmas Tree

I picked up this tall/thin Christmas tree recently for $4.00 at a yard sale.

It wasn't my intention to get it-- but then I saw that the garland looked like netting and that the tree had seashells glued to it... totally drew this pirate in! I had an instant thought, "Mermaid Tree." Nuts--- another project that is getting me off track of finishing up some Christmas gifts I'm making.
I couldn't leave the tree "as-is" as it looked a little beat up. I folded back the tips of each branch about an inch, to create a thicker/fuller looking tree. Then I pulled off and re-glued the pearl garland back onto the tree to clean it up a little bit..
 Then I set out to make some ornaments for my mermaid tree. I painted small bits of coral and then attached them to some ornament hangers.

I had recently bought a large bag full of replacement Christmas ornament hangers for $1.00-- just to have on hand in case I needed them. Score.

Once the coral was painted, I added glitter a few pearls and little bits of moss to each one. I love moss.

I really like how the coral looks on the tree. 
I made some pink glittered coral too~

I also made some glittered seaweed....

Well, that's what I'm calling it anyway.
 
 Lastly, I started making the mermaid ornaments for this mermaid tree. I used paper clay and a small face mold I had to create the little heads/faces. I used foil, tape, a little bit of pipe cleaners for arms, a little piece of cardboard for a tail and the mermaids started to take shape. Once the base of each mermaid was created it was just a matter of adding paper clay to each one--- and you know, smoothing, letting it DRY, sanding, adding more clay-- smoothing, letting it DRY, sanding and repeat a LOT until your kinda satisfied with how it looks. Here you can see the mermaids about 95% finished before getting some paint...
I think it is going to be another few days until I get these painted and onto the tree. I should have made the mermaid ornaments first! These are taking longer to create than I had anticipated. I'll share them when I've finished with them :-)
big hugs,
Cheryl

12/2/16

Vintage Lockers

For years I have been wanting to find old school lockers to have inside my house. I've come across some, but they were always to tall or the person selling them was wanting way.to.much. money for them. And what if I pay the money and drag it home and then hate it? That has been known to happen with things I've bought in the past. *wink*
Last week I went to our local swap meet--- on a Friday of all days-- and happened upon this beauty for only $20.00. (talked down from $25- because that's how I roll) Small, but not to small... it stands at 4" 6".
 Of course, when I spotted it-- it looked like this:
There was acrylic paint on some of the locker doors, and it was covered with years of grime. The interior of the lockers were dirty, but nothing a few buckets of sudsy hot water and elbow grease couldn't handle. With about an hours worth of sanding and scrubbing the entire piece was ready for a fresh coat of paint.
 
Just look at all the potential storage. *swoon* I'm going to thread some bolts through the holes in the sides of the locker walls and then add a piece of plywood to make a shelf in the middle of some of the lockers.

I found the map covered letters spelling "Love" at a yard sale for $1.00 each. I tacked them on the wall above my new lockers that I love.
I had bought the glass terrarium at a yard sale for $1.00. I had tried to keep a plant alive inside it. Yep, that didn't work out so well. But now, I have a beautiful container to hold some of my antique Christmas ornaments.
One of the many things I like to collect is old class photos. I have no idea why, I just think they are charming. This particular photo I made copies of and then cut one photo apart and applied it on top of the other so when your looking at it straight on it gives the illusion of real depth. Here you can see it in the photo below.
 I placed my antique dress form next to my new lockers. On the other side of my new lockers I want to make a 4' industrial looking hall table. I originally wanted a super long hall table, but with my new lockers and the front door needing to be opened against the wall-- I'm down to 4'. But I can do it!.... well, Pinterest and I can do it! (I guess I could also move my dress form somewhere else to make more room.... oh bother)
 I also picked up a new pirate chest. This one was only $18.00. Why the funny price? I talked the guy down of course--- he just wouldn't go down to $15... but he would do $18.
 This green trunk will eventually be painted differently, but for now I love it just the way it is.... I especially love how someone had repaired one of the corners. Hysterical!
Well I must get back to sewing on more doll clothing for my grandaughter's dolls. I may just make a few outfits for my own dolls!
big hugs,
Cheryl