Pages


1/28/22

Boutique Signage

I've never had a sign for my boutique table when I've sold at events... nothing appealed to me that was being offered up for sale online. I joined a group on facebook for vendors and read everyone's opinion on having your business name with your products and thought they were valid... so I ended up creating this little cutie pie to sit on my table.

 I think it is important to "do you"... I just couldn't do the typical vinyl sign... not that there is anything wrong with that type of sign-- it just isn't me. You get me. 

Firstly, I don't know what it is about rescuing and repurposing things that just gets me so happy... so, when I came across this crooked little sign at our local swap meet I knew it was meant as a sign... for me to make a sign.  For only a dollar it was well worth seeing if I could revamp it and make it work for me.

The sign was crooked... so, I had to build up the base of the stand so that it would sit straight and then I had to tackle that squatty bird cage at the top of the sign. I managed to bend and cut it off, no easy feat I tell you. 
 
I covered the front and back of the wood piece with sheet music from the 1800's *swoon* I think it is important to surround yourself with things you love... even when your selling your wares! I water washed the edges of the sheet music with burnt umber acrylic paint which gave me a great base to work on. 

I cut out the words "Artsy Fartsy" out of an aluminum can using my alphabet metal die cuts. Then it was just a matter of gluing on moss and flowers to finish it up.
I drilled holes into the board so I could feed a thin strand of fairy lights through the board so that the battery pack could be attached to the backside out of view. I also can change out the batteries easily too. I have one light on the backside so I can see when the light goes out. (I'm going to be adding more flowers to the backside too)
 
Well, I think it came out super cute and I can't wait to display this sign on my table full of things I'm offering up for sale.  For now, I'm enjoying it sitting on my desk.
 
I still have yet to start making anything to actually sell!.... eiy-eiy-eiy...

1/25/22

Quartzite

I went to Quartzite recently with some friends for a week. It was so much fun :-) I bought a lot of little do-dads that I can put in my booth in March. I ended up buying a lot of things in bulk. I tell ya, once you get in the habit of doing that, it is hard to break. I just wanted to buy the butterflies from this one vendor who had all of this shown below in a container..... I couldn't see myself sorting through them for just those. So... "How much for it all" was met with a price... and here we are.

I bought a bunch of little animals cut out of rocks. Owls, squirrels, dogs, turtles and seahorses. I thought they would be cute sitting on my tree stump shelf.
I bought the little "mud" cabochons and the green diamond cabs with a thought of doing some kind of pixie necklace... we'll see how that pans out.
Here is a bunch of miscellaneous things I picked up. Of course, now it looks like heaps of junk... but I've got plans for it all!
It was so dusty... all the sparkles are covered with dust...
Of course I had to add to my huge chip bead stash...
I was taken by the colors of these butterflies, so I bought a bunch.
I am always needing more skulls... I think I've now got enough to not worry about running out any time soon.
I love a fun sparkly crystal~ These are  not specimen pieces by any stretch of the imagination, but are just cut off chunks.. but all beautiful none the less.
I have a bazillion other things I've bought-- but I've managed to squeeze it away already into my ever shrinking studio. I was needing some leaf beads and I ended up buying in bulk 11 HUGE bags of leaf beads in eleven different colors. I would love to have them displayed in eleven glass jars... but for now, they are in a tote because like I mentioned before.. my studio is shrinking :-P

1/5/22

Little Pixie Houses

I created some tiny pixie houses out of little Pringle cans. I think they turned out super cute. I bought a box of 15 little cans of Pringles and while I've only completed making four, I'm making more!

Although I didn't make them to sit on the tree stump shelf I had previously made, I placed them for a photo.
I used real rocks for the little stepping stones up to each front door.
I didn't feel confident that the little plastic windows would stay in place, so I only made two with real windows. When I continue to make these little houses, I'll just leave the area open.
Four down and 26 more to go... I bought a second box of Pringles :-P

1/2/22

Happy New Year!

 Goodness... the older you get the faster time goes by... *heavy sigh* 2022... wowzers. Sounds almost like a science fiction movie title. Of course the past few years we have been living in a real science fiction reality... eiy-eiy-eiy...

Anywho, resolutions... I did none of the things I had written for my resolutions last year. lol... classic me. Okokok... a major one (I didn't list it) was to survive during the pandemic without contracting Covid 19 or any of the variants. I guess that is the most important of all the listed and not listed things to accomplish in a year... So, SUCCESS! *wink* 

I don't think I'm going to make a list of things I won't accomplish this year lol.. well of course I'm going to keep the "survive during the pandemic without contracting Covid 19 or any of the variants" one... because evidently that is one I'm successful at! Fingers crossed for the new year.

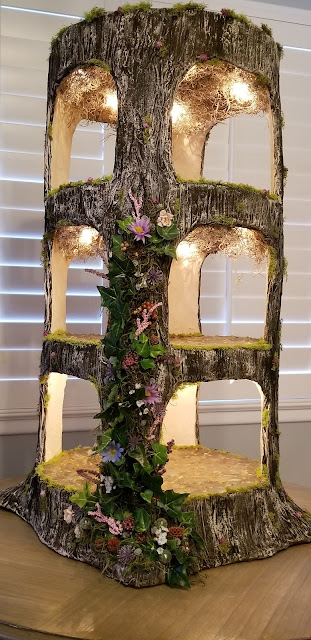
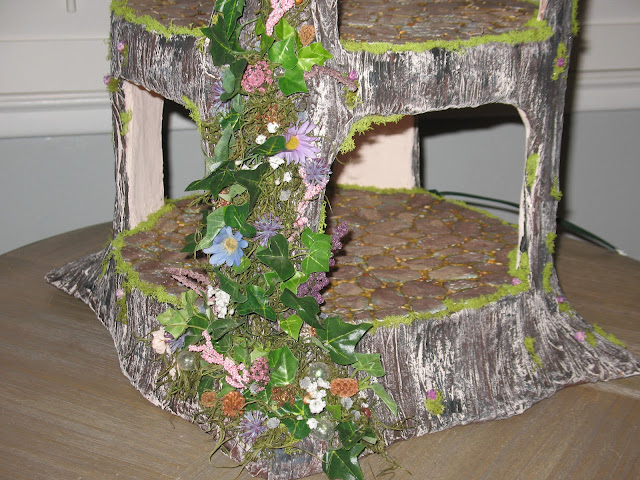
Anywho, on new years day I competed my tree stump shelf!


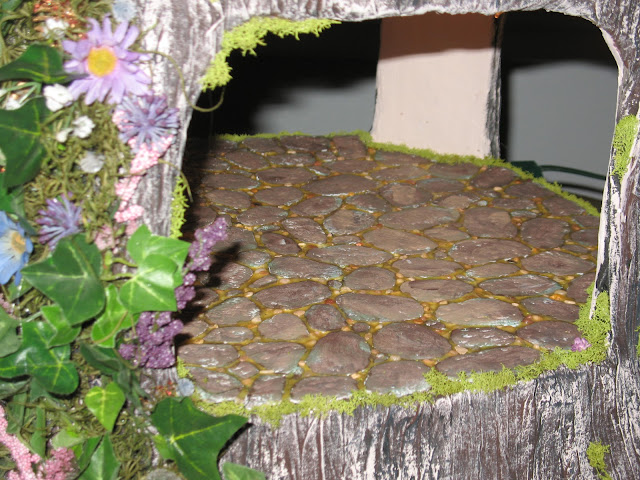
 I painted the Stroyfoam to look like cobblestones. I added wood glue in between the newly made stones to act as the grout. The wood glue is beige in color but came out looking different colors-- to which I love! I also filled in little spots with some fish tank gravel.
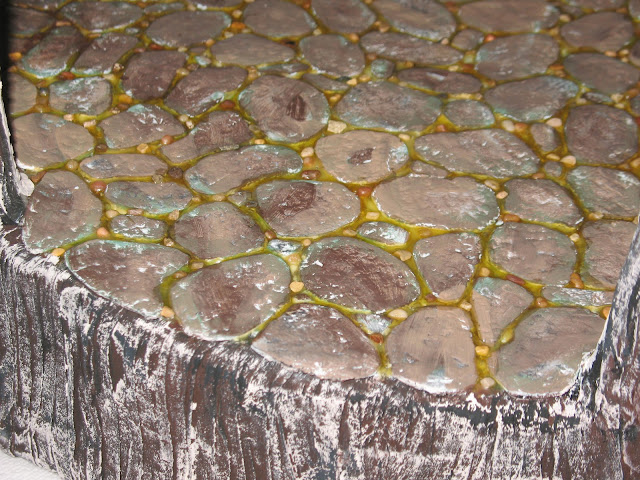
I purchased a quart of beige paint from a hardware store to paint the inside of the tree stump. I normally use the little bottles of craft paint, but I figured this was turning out so cute, I will probably be making a few more tree stump related things.

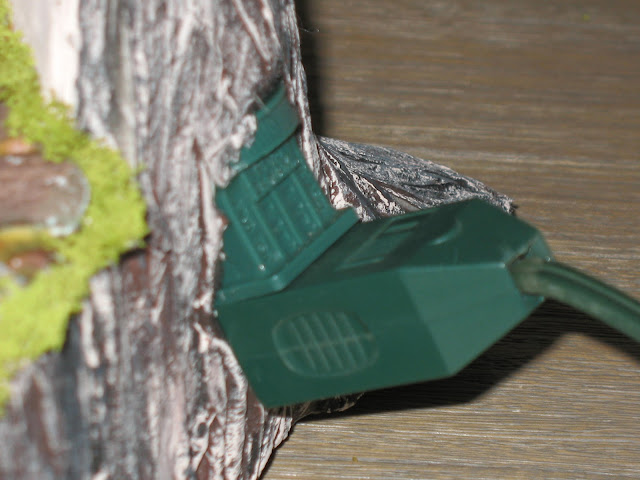
The electrical plug for the lights ended up working out beautifully. I didn't want it to be to obnoxious looking-- but still able to be easily accessible.

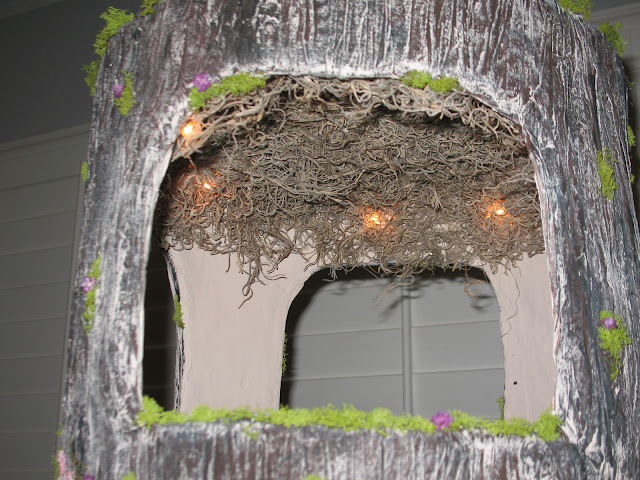
Here you can see the ceiling on the top shelf. I didn't like just looking up  and seeing a flat ceiling, so I added some sphagnum moss to the area. I think it makes the lights look very magical.

I added some faux flowers and ivy along with some green moss to the tree stump. I love how it looks.

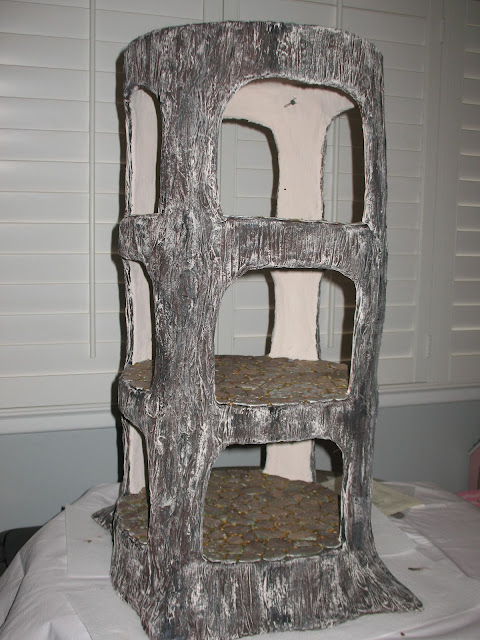
Here is the bottom shelf and the middle shelf...


I can't wait to see how this looks when it frames some of the things I am eventually going to be making!


I'm really needing to focus on creating things to actually sell...but first, I've got to play!