Pages


12/10/15

Candy Cane Reindeer

Every year I like to make something using Candy canes, this goes way back to when my daughter was little... I would make cute little candy cane crafts for her classmates every year. Now that I'm a grandmother of two, I still like to send them to the kids classrooms... but now I find myself having to make double! In years past I've made candy cane mice, cats, poinsettias and last year I made some elves. This year? I'm making Reindeer.
 
I made sixty reindeer for the grand kids to take to school.
I modified the pattern that I had made last year for the elf candy canes..
If your wanting to make some yourself, I've included in this post a printable pattern along with some pointers on how I constructed the reindeer candy canes.
I like to cut all the pieces that I'll need- all at once and have everything in piles and then glue all the paper pieces together. I then construct the candy cane bodies,  and after those two piles are constructed, it is just a matter of attaching the paper to the candy cane and it is finished.
For the heads/faces of each reindeer-- your needing one head piece cut on the fold of some brown card stock. I used white glue to attach the pinks of each ear along with the beige fur piece between the ears. I used hot glue to attach the 5mm red pom pom and the wiggly eyes. I also glued about 2/3 of the front and back of the reindeer's head together, I'd say from the nose up- use glue, nose down-- no glue. Don't glue it completely together as you'll be needing to slip a piece of a Popsicle stick in between the paper to act as the reindeer's neck. Once the features on the reindeer's face are finished, I attach a brown pipe cleaner bent to look like an antler to the backside of the head, beside each ear.
Once the antlers are in place, I used white glue to attach one of the two red Santa hats needed for each reindeer to the front of the head.
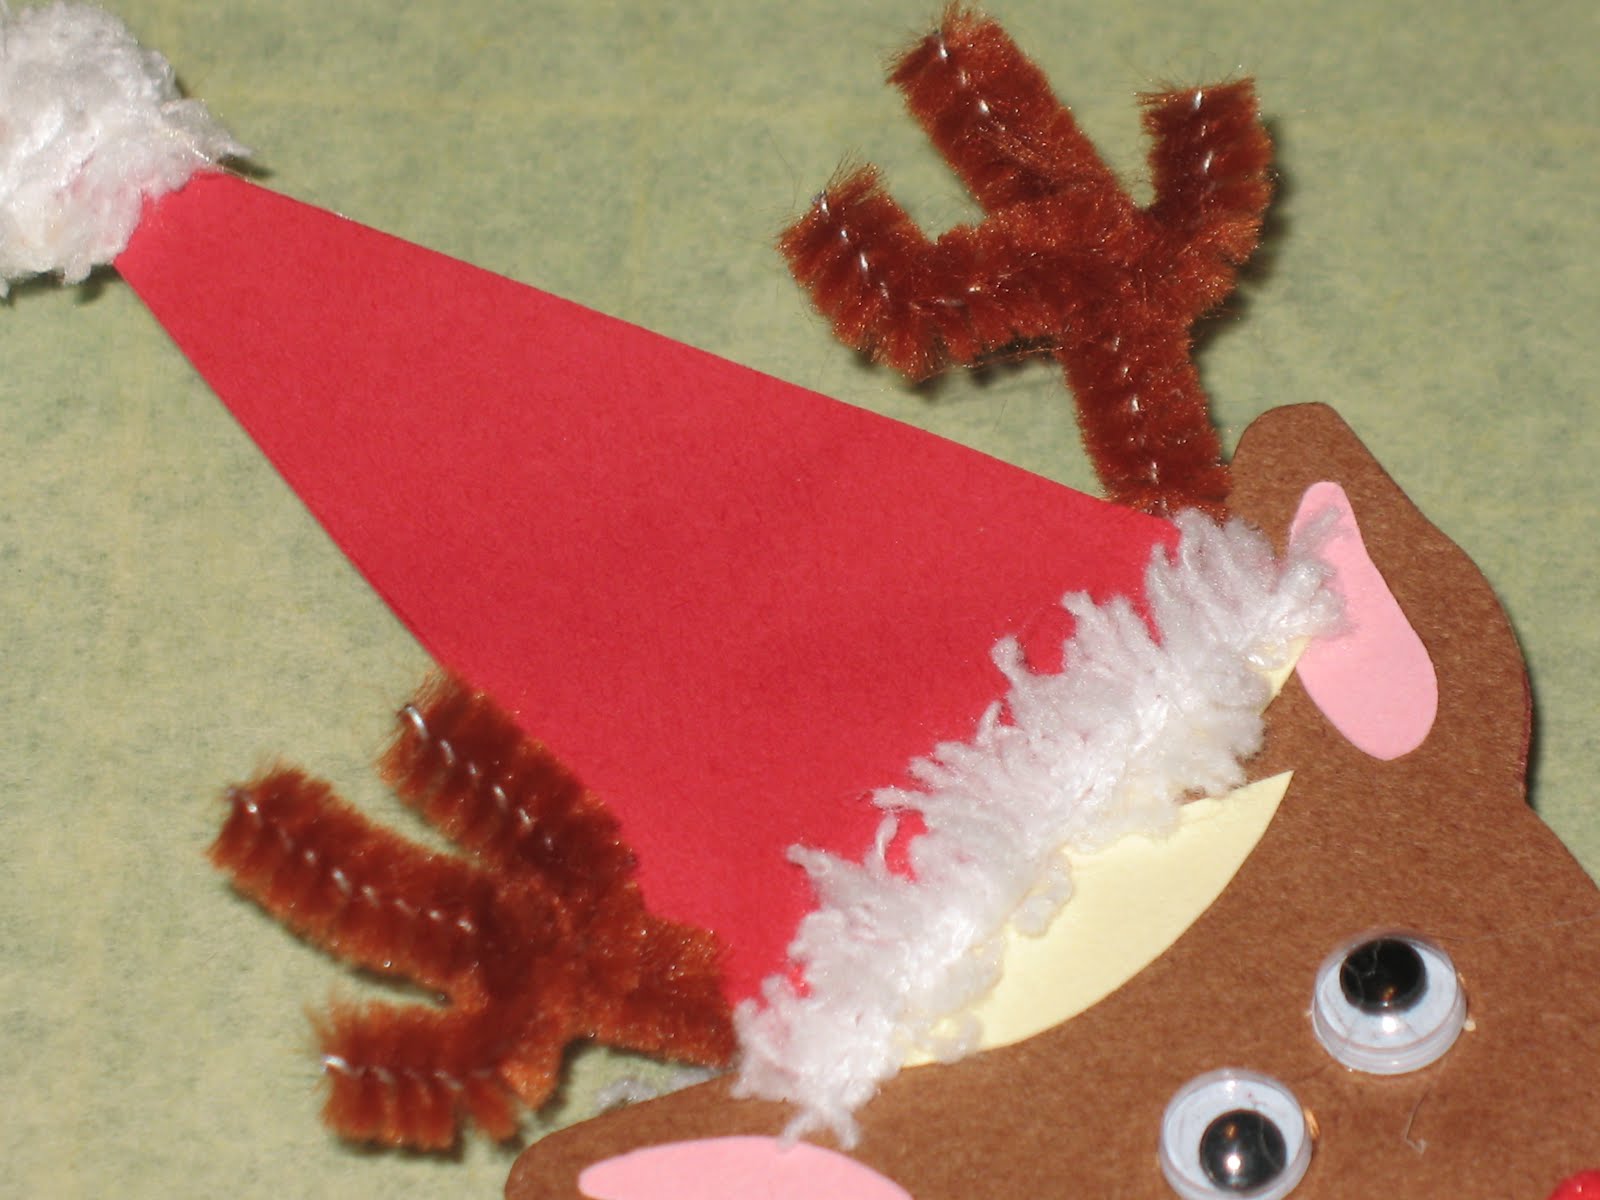
The second red hat will be glued on the backside to cover the edges of the pipe cleaners so it looks nice. You will need to use hot glue to get a good seal over the pipe cleaners. I used a white yarn called "Fluffy Chunky" to create the look of white fur on the hats brim and pom pom. I again used hot glue to attach that. Lastly, to finish up each head, I cut a popsicle stick into thirds and covered the stick using the same brown colored paper as the head and body. I then hot glued each neck into place between the unglued portions of the head.

For each reindeer's body I traced the bodies onto a folded piece of brown paper and cut them out. The beige tummy-fur was glued on with white glue. Lastly, I cut a small sliver out of the papers fold in the center to create an opening to slide the neck/popsicle stick into. Below is a photo of the cut created. Shown with the paper opened to showcase it better.
With the cuts in the bodies fold, it was easy to slip the neck into place and hot glue in place to one side of the body.  To create the candy cane body... I cut out four reindeer hooves out of brown felt. I then glued a hoof to the bottom of each candy cane and then another one to the other end. One will be the foot and the other the hand. Once all the hooves were attached, I hot glued two candy canes together.

Once the glued dried I wrapped some masking tape over the glued area for added strength.
 
Once the bodies were completed, it was just a matter of taking the paper reindeer that I had previously put together and gluing it to the candy cane arms and legs. I put a dab of hot glue on the tape in the front--- and glued the paper torso in place. I put some glue on the backside on the tape along with some glue on each side of the body to hold it together.
Then I pulled the paper taut as I held the pieces in the glue until it set.
Easy peasy... Lastly, I added a white bow to the reindeer to finish it off. He is a handsome fella' isn't he?

Once you get the hang of creating the reindeer, it is very easy to mass produce them once all the pieces are cut out.
 
I've already got two ideas for next year... a ballerina and a toy solider.
big hugs,

12/7/15

Surprise Package

I attended a Christmas party recently where I took part in an ornament exchange. I decided to add some va-va-voom to the wrapping of the ornament...so, I created an exploding box to house it. On a pedestal of course- because that is just how I roll~
 
I pulled out a sound chip module out of a birthday card I had received and attached it to the side and base of the box. Once the sides fall down, the song begins...
The song is "Ladies Night" so I found an ornament that would tie in with that song... Champagne and chocolates of course! Because isn't that what we all drink/eat when we have a "ladies night?" *wink*
 Instead of creating the box myself, I found one at the dollar store to use as the base. I also picked up a glass candlestick and some poinsettias... 
It was very easy to create. I simply cut the box so that the sides would fall down making it flat.

I then used black construction paper to cover the edges so it would have a really nice finished look to it when it was completed.

I then cut patterned glitter paper for the outside of the box and silver glittered paper for the inside. I also created a little pedestal with an oval cut out of it to help cradle the ornament and to house the music chip module. I used white glue to attach all the papers and a glue gun to add the pedestal to the base. Lastly, I hot glued the glass base to the package and some poinsettias to the lid. Easy peasy~
It was a lot of fun to see everyone's reaction when the sides fell down and the ornament was revealed with the music playing. It was the first ornament to be picked by my friend Verlon whom I've known for years and years. She said it was nicer looking than her Christmas tree... which made me laugh out loud. My Christmas tree is a 2' high tree with the price tag still on it sitting on the table next to a container of newly bought ornaments. Yep. That is how I roll as I get older. My lovely white tree with all the fancy shabby chic ornaments are still up in the garage rafters.

 I have a lot more parties on the horizon... with a lot more things I'm needing to get working on....so many parties and so little time to get everything finished! Who has time to decorate a tree. :-)
big hugs,

12/1/15

Candy Cane Scarf

I finished up a few crochet items that I started a few weeks ago. I love-love-love to start a new project... I hate-hate-hate to finish them. *wink* I say that--- but I am delighted they are finished and happily going to be worn by my six year old grand daughter. I made a candy cane scarf. I crocheted it on the diagonal using a half double crochet stitch. That was a lot of trial and error seeing how I made up the pattern as I went along.
 I also made some candy cane boot cuffs~
 Lastly in this set I made a candy cane head scarf~
The half double crochet stitch is an easy stitch to build up rows really fast. When the set was all finished though-- it looked like it was needing something... so, I added some fuzzy white yarn around all the edges. I lurve it~

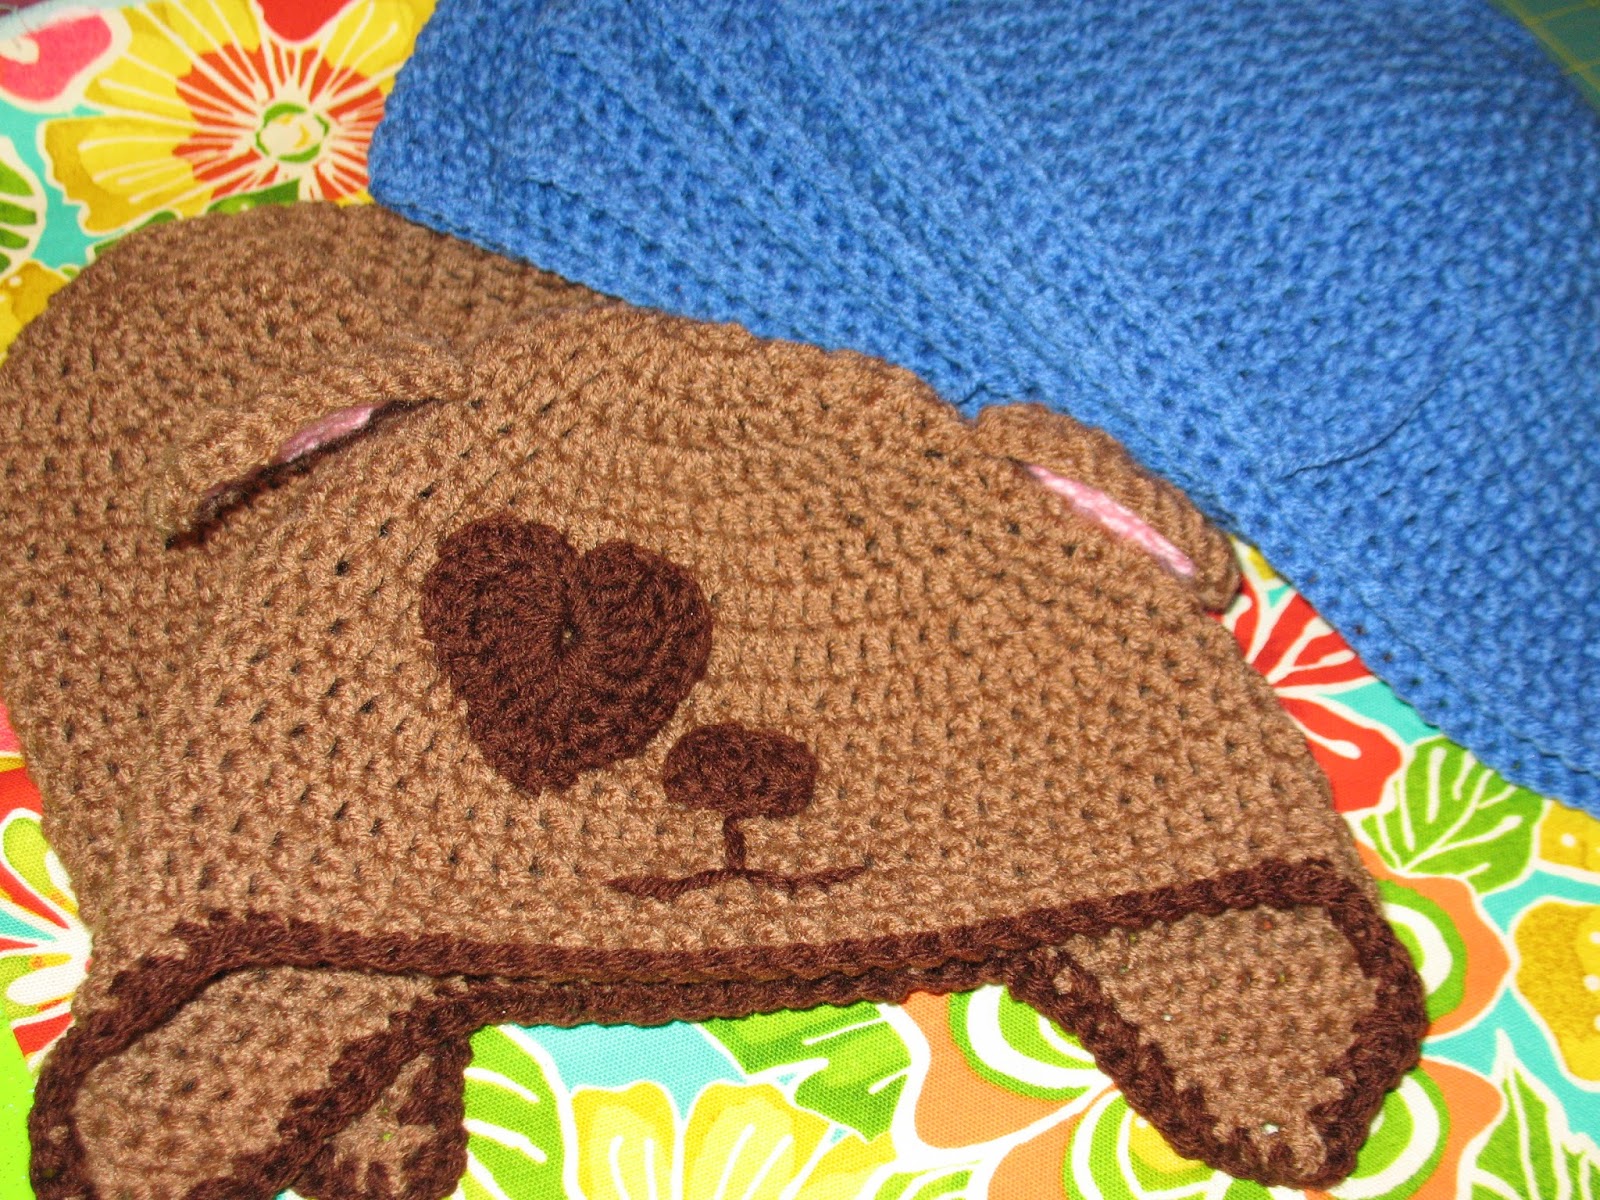
I also finished up two puppy hats. One for my grand daughter... and one for her to give to any friend of her choosing.
I see a lot more hat requests in my future. 
big hugs,

11/24/15

Treasure

Even though the weather is getting colder outside...(in the 50's - 60's) I have managed to bundle up enough to force myself to go outside in search of treasure. I don't like to be cold at all! I got this small steamer trunk for only $30. It is in very good condition other than the paint job. *wink* Someone had taken the time to hand paint the embossed metal on the trunk... very shabby chic, it will stay like this until Spring when I can get it outside and paint it to better fit in with my pirate theme.

I was told this wooden toy rifle was bought at Disneyland in Frontier land. It isn't marked, so who knows where it originally came from. I paid $3.00 for it, I think it will look fabulous inside one of the pirate stores hanging on the wall. The really large golf net and the hammock were only $5.00 for both. It is not easy to come across really large "real" netting. Most of the time I come across scrap pieces of real fishermen's netting and the prices are triple for what I buy golf nets and old worn hammocks.
 The brass tray below has abalone shell inlay around the edge. Pretty.
I found more trays and bags of colorful booty. I love-love-love the scalloped edges of the footed tray.
I managed to score two Jim Beam half barrels for $30...they were originally used for a display. Eventually I am going to make them both into small stools. 
Speaking of stools.... look at these oak stools that I bought for $2.00 each. You heard me right, two bucks each! These were the first purchase of a fabulous shopping day!
The seats look like little barrels... *swoon* they even swivel.
With the colder weather comes the "falling of the leaves." I honestly don't mind sweeping/raking up leaves. This year instead of tossing out the leaves, I am going to place them in the flower beds to help keep the Cannas tubers warm during nights of frost. We don't get to many freezing nights... but even one frost filled night can kill 'em dead or weaken them for the next growing season. My Cannas plants are kinda sparse as I had to cut the tubers to get enough plants to plant around the fence line. I am hopeful that the plants double themselves each year.
During the Winter months I still have projects I am working on in my yard. We pulled down the metal canopy that used to be over the lagoon area. It was always my intention to have that area covered with a much larger wooden structure. It seemed like the temporary covering was turning into the permanent covering.... so it had to go. No time like the present. Of course, this means a lot of reworking the area and moving around the plants to better fit under the new covering. I'm doing away with some of the planter along the fence to make the area a little wider. I have a huge bird of paradise that I just transplanted and I'm in the process of bundling up for winter. I've had this plant for about five years and I'd be so sad to see it die.
I am hoping to get the new gazebo (for lack of a better word) built before the frost comes and damages a lot of my plants. Having a hard cover over the top surprisingly keeps the area a little warmer... plus, I normally have every plant in this area completely wrapped and covered for the winter season. It looks like a homeless encampment with random blankets, sheets and things covering every square inch...

As you can see I always have something major I'm working on. I keep thinking I'll have time to start working on something inside my house, but that never seems to happen. I still haven't painted my kitchen... eiy-eiy-eiy...  Next up?--- I've got a massive Elephant ear plant that is in my sites for being moved... wish me luck :-)
big hugs,

11/10/15

Winter Crocheting...

I have been struggling with a bad-bad cold going on several weeks now...Nothing life threatening, just a cough from hell. I have been trying my very best not to go out into the cold to aggravate it any worse so I've been staying inside and doing a lot of crocheting...
I've made eight hats... The two brown ones are going to be puppy hats for my grand daughter and whomever she wants to give the other one to. The six blue hats are going to be made into Daisy Girl Scout hats for my grand daughter's Daisy Girl Scout troop.
 I'm still in the process of making all of the daisy petals for each hat. I need to make 10 petals in different colors for each hat. Each petal symbolizes something that the girls have learned with Scouting. I also whipped up a little Owl that was touted as a project to use up scraps of yarn. I just made one so far, once I add eyes, I'll see if its cute enough to make more.

I also came up with a swirly frosting pattern for my crocheted cupcakes. I made 4 of the cupcake wrappers and 10 frosting dollops. I've now got the frosting pattern memorized.
I also made a pair of slippers for my grand daughter. The yarn I used was an impulse buy... It looks beautiful as a skein, but as a finished project, not so much.
I do believe it is officially winter here in California as my little cat Pee Wee has given up hunting at night for the warmth of a fleece blanket.
As my bad-bad cold is nearing its end... (I hope) I am wanting to get outdoors and start building a new patio cover for over the lagoon area in my backyard... and also, I need to buy some more yarn. *wink* 
big hugs,