Well, I managed to go to two block sales today. This is the start of the sale-ing season for me. Ahhhhhhhh to be looking for treasures... arrgh! Here is my bounty!
I got this antique picture frame with the hand painted photo of a baby in it for...
hold onto your hats.... .50cents! What??? I had asked the gal, "How much for the baby picture?"
You know, playing it all cool~ She replied, "Fifty cents".... I said, "For that" as I pointed to it. She said yes-- you could sense that she was waiting for me to say a quarter lol... I stuck it into my handy-dandy shopping cart and forked over .50cents! Wow!

The wire leaf metal basket was $3. It is super lovely, I got compliments on it while holding it-- thats always a good sign its a good buy! The oblong dish, which is actually a beautiful creamy pink was $4. The elderly lady said she had purchased it in 1952 and had it all these years. The white dish with the roses on it was $1. The gal I bought this from said she bought that in England on a trip for a lot of money. I told her, "Why? you could have picked it up at a yard sale much cheaper. lol I also got a Shabby Chic duvet cover with the matching pillow sham for $10, that is the pink floral fabric under all this
stuff~

The jewelry that is in the dish was .25cents each! The Disney pins were .50cents each. Those run from $5-$10 at Disneyland, I know because I was looking at some just recently at Disneyland.

Ohhhhhhhhhh and the gold filigree oval container was .50cents. Fun, fun day of sale-ing!


 You just mix the two together until it is blended, then I just spooned a little into each mold I was using. I added glitter to these ones pictured below. If I was to give advice to anyone wanting to try this...it would be this. Don't mix to much resin, a little surprisingly goes a long way. Another tip? Find a level shelf or table for these to set on for the needed curing time. Seriously, I think my entire house and contents are on a slight incline!
 I've got another batch I'm working on.... now what to do with them all??


 3.) Next I used my hot glue gun to drip/dribble glue around the pvc pipe to give it the appearance of hot wax that had dripped down the sides of the candle. You can do a lot...or just a little bit whatever is to your liking. I went around the entire candle several times so it had a nice build up of melted/dripped wax.

 5.)When the candles had all dried, I quickly painted black acrylic paint over each candle rubbing off most of it to give it an aged look. You can see below the difference the black paint gives each candle. I wanted them to look old and dirty.... these are going to be used as props at our yearly pirate party.

 Of course I was careful not to disturb to much of the dust on the candelabra-- I'm going for an authentic look of course ;-P
 Hmmm what ta' do-what ta' do... *lightbulb moment* why not stick the platter on the vase with some e6000 glue and make it into a bird feeder. I traced the circumference of the top of the vase to use as a pattern on the underside of the platter so that the vase would be perfectly centered when the glue dried. Once I had the pattern cut out, I traced the circle onto the platter... then I just slathered the glue onto the vase and set it in place.
 The hardest part... waiting for the glue to dry~
 24 hours later....
 Now, I've just got to wait for the rain to subside so I can place it outside and fill it with birdseed.

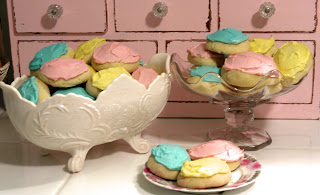 Easter egg cookies
 I've started making some wire nest pendants. Oh-my how addictive these are to make! I've used a beautiful pink pearl on these ones~
 I have a lot of real nests in my home. Last summer I bought 16 real birds nests for $8 off of someone on craigslist, blogged about

 I am always drawn to nests as is everyone else! If you type in the word "nests" in the Google search bar on the upper right corner of my blog it will take you to some more posts about nests that I've blogged about.
 Next, I pulled the inside of the wreath to the bottom to make it into a nest shape. You can see in this photo below the depth of the nest already taking shape.
 For the bottom of the nest I cut a circle out of foam core and covered that with some vintage sheet music. I used hot glue to attach it to the bottom of the nest. I glued green & brown moss in between some of the sticks to fill in some of the larger open areas. I covered the edge of the foam core at the bottom of the nest completely with more moss so you cannot see a sharp edge at the bottom.
 I finished it up with some pink berries and a few small flowers. Easy peasy~
 Now, I'm in the market for an even bigger wreath to make an even bigger nest!